


How do you wear a low-cut dress while still getting the support you need and avoiding visible bra straps? Breast tape is the answer.
We'll walk you through applying it correctly to ensure it does its job without causing discomfort or fashion mishaps. Whether you're a first-timer or looking to perfect your technique, stick with us.

Before You Apply, Prepare
Before wearing boob tape for the first time, it's a good idea to perform a patch test. Place a small piece of boob tape on your chest area for up to 8 hours to check for any skin sensitivities. If you experience any discomfort, remove the tape right away. Otherwise, you should be good to go if you don't encounter any issues.
Before applying your boob tape:
- Ensure your skin is clean and dry.
- Start by washing the area with mild soap and water to remove oils or lotions.
- Dry your skin thoroughly since moisture can prevent the adhesive from sticking properly.
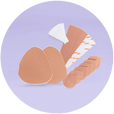
Gather Your Supplies
In addition to the tape, you'll need to gather the right supplies:
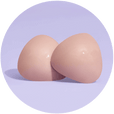
- Nipple pasties: These will protect your sensitive areas.
- A mirror: This will help you place the tape accurately.
- Sharp scissors: You must cut the tape to the correct size.
How to Apply Boob Tape for a Low-Cut Dress
Apply Nipple Covers
Wearing nipple covers will shield the area from the boob tape's adhesive. Start by ensuring your skin is clean and dry, free of oils or lotions. Peel off the backing and gently place the cover over your nipple, pressing down to secure it in place. Make sure it's smooth and has fully adhered to your skin. This will avoid visible lines under your clothing.
Measure and Cut the Tape
Determine the length of tape you need for your dress. Cut the tape according to your measurements, ensuring it's long enough for support but short enough to stay hidden under your outfit.
Apply the Tape
For a low-cut dress, you want to start by securing one end of the tape at the base of your breast, then gently stretching it upward toward your shoulder to lift and support your boobs. Create your desired cleavage while keeping the tape invisible.
Use as many strips of tape as you need to feel secure, but avoid using excessive tape, which could end up being bulky under your clothing. That said, those with big boobs may need to use more tape.
The tape should be tight enough to support you but not so tight that it limits your movement or makes you uncomfortable. Always smooth out the tape as you apply it to avoid wrinkles, which can show through your dress.
Common Mistakes to Avoid
- Skipping skin prep: Always clean and dry your skin before applying boob tape to ensure it sticks properly. If the tape starts slipping, it could be due to oils or lotions on your skin.
- Incorrect tape placement: Customize the tape placement based on your outfit. For example, backless dresses may require different placement than strapless ones to keep the tape hidden.
- Applying tape too tightly: While it might be tempting to pull the tape tight for even perkier boobs, this can cause discomfort. Apply the tape with gentle tension to avoid skin irritation.
- Forgetting to use nipple covers: Protect your nipples with covers to prevent discomfort and ensure a smooth, invisible finish.
Adjust the Tape
Don't just walk out the door! After applying the tape, you need to check for comfort and support. If necessary, you can reposition the tape to ensure it feels secure without being too tight. The tape should lift your breasts while still remaining breathable and comfortable. Try walking around, sitting, standing, and twisting to check your range of motion. Make any last-minute adjustments before you head out for your event.

How to Remove Boob Tape Safely
Once you've enjoyed your night out, it's time to remove the boob tape carefully. To avoid skin damage, do this slowly and gently.
- Soak the tape with baby oil, coconut oil, or a specialized adhesive remover. This helps dissolve the adhesive and will make the removal process less painful.
- Peel the tape back gradually, supporting your skin with one hand as you remove the tape with the other.
- Repeat steps 1 and 2 as many times as needed to remove every last trace of adhesive.
- Discard the nipple covers if your pasties aren't reusable.
- Cleanse your skin with a mild, non-irritating cleanser.
- Moisturize your skin to keep it hydrated and soothe any irritation. If you've experienced any redness or discomfort, consider using a soothing balm or consulting a dermatologist.
Don't Forget …
Remember, boob tape is designed for single use. Reusing the tape can compromise its adhesive strength and reduce subsequent wear support. So always throw away any used tape and start fresh each time to keep your skin healthy and ensure your look is always on point!
Frequently Asked Questions
How do I prepare my skin for boob tape?
Before using boob tape, ensure your skin is clean and dry. Avoid moisturizers, oils, or powders on your chest area, as they can interfere with the tape's adhesive properties.
What is the correct way to apply boob tape to low-cut dresses?
Apply the boob tape on the underside of your breast and pull it upward, securing it at your shoulder. Smooth the tape as you go, ensuring you've pulled it securely but not too tight to not limit your movement or be uncomfortable. Add more strips for better support and lift.
How do I remove boob tape without damaging my skin?
Always remove boob tape gently to avoid skin damage. Use natural oils to loosen the adhesive and support your skin with one hand as you peel away the tape with the other. Cleanse your skin thoroughly afterward and apply a moisturizer to soothe your skin and keep it hydrated.
How do I prevent boob tape from slipping or causing skin irritation?
Ensure your skin is clean (no oils or lotions) and avoid creating excessive tension while placing the tape. Limit your wear time to no more than 8 hours. If you experience persistent irritation, seek dermatological advice.
댓글 0개