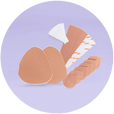
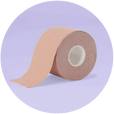
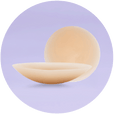
Have you ever struggled with removing boob tape after a night out? You're not alone.
While boob tape is excellent for making your boobs look perky, many women dread the removal process, fearing the discomfort that might come with it. But fear not! We're here to change your mind with easy, tried-and-true methods to make your post-party routine a breeze.
Why Proper Boob Tape Removal Is Important
Boob tape is designed to adhere securely to your skin, provide support, and lift your boobs without a bra. However, your skin beneath and around the tape is delicate, and improper removal could lead to skin irritations, rashes, itching, blisters, or chest acne.
Best practices, such as peeling slowly, using oil to loosen the tape, and practicing proper aftercare, can help maintain your skin's health and comfort.

Application Tips for Easy Removal Later
Believe it or not, stress-free boob tape removal begins with proper application. Here are some application tips that will save your skin when it's time to take off the tape later:
- Ensure your skin is clean and dry before using boob tape.
- Avoid lotions, oils, or any substances interfering with the adhesive.
- Use nipple covers to protect your sensitive areas.
- Don't use boob tape on irritated, sunburned, or sensitive skin.
- Don't use boob tape if you're pregnant, lactating, or have skin conditions like eczema or psoriasis.
Step-by-Step Guide to Removing Boob Tape
When it comes time to remove your boob tape, choose a time and place where you can be calm, go slowly, and focus on minimizing any discomfort. Follow these steps for a gentle removal.
Step 1: Apply a Removal Aid
Before you start peeling, liberally apply an oil-based product like baby oil or coconut oil to the edges of the tape. If you're using a specific boob tape remover, soak the tape and allow it to sit for up to 5 minutes to break down the adhesive.
Step 2: Peel Away the Tape
Start from the outermost point of the tape and work toward the center. Hold your skin taut with one hand to minimize your discomfort, and begin peeling slowly with the other. If you encounter any resistance, stop pulling and apply more oil, letting it sit for a few moments to loosen the adhesive further.
Rather than rushing this process, take it slow and steady. This avoids extra stress on your skin and ensures a thorough removal. If you were wearing nipple covers underneath the boob tape, remove those, too.
Step 3: Clean Up Any Residue
Once the tape is off, cleanse the area with a gentle cleanser, being cautious not to scrub too hard. Pat your skin dry after cleaning.
Step 4: Practice Proper Aftercare
Apply a soothing moisturizer or healing ointment like aloe vera, calendula, or vitamin E to keep your skin hydrated and nourished. Give your skin some time to breathe and recover. Avoid tight clothing or restrictive undergarments immediately after removing the tape. Opt for loose-fitting attire made from breathable fabrics.

Avoiding Common Issues
Common mistakes or issues with removing boob tape stem from leaving irritants on your skin or being rough with it. Follow this advice for a smooth removal process and healthy, happy skin.
Use oil instead of water for removal. Most tape is designed to be water-resistant or waterproof, meaning it can maintain its adhesive properties even when exposed to water. However, oil can help dissolve the adhesive.
Don't use excessive force. Start from a corner, gently lifting the tape as you apply oil. Gradual removal helps avoid skin irritation.
Handle irritation or redness right away. Add an alcohol-free lotion like aloe vera gel to the affected area to soothe it. If irritation persists, seek advice from a dermatologist.
Remove all traces of residue. Use your fingers to apply coconut oil over the remaining residue. After 15 minutes, rub the area with a soft, warm cloth.
Wash your skin afterward. Once all traces of tape are gone, wash the area with warm water and a mild, alcohol-free soap. Moisturize the area to hydrate and soothe your skin.
Don't reuse boob tape. In general, boob tape is designed to be single-use. Reusing it after removal is unsanitary, and the adhesive is unlikely to be effective.
Seek out instructional resources. Does the brand have detailed application and removal techniques? Refer to videos on the brand's website or instructions in the package, etc. These can provide visual guidance to help you avoid skin damage. For example, discover Nueboo Boob Tape how-to's and basics on the website.
Frequently Asked Questions
What is the easiest way to remove breast tape?
Slowly pull the tape back against itself, avoiding a 45-degree angle. If needed, apply more oil to stubborn spots. Instead of ripping it off like a bandage, apply oil with your fingers to remove any remaining adhesive from your skin.
Does boob tape come off with sweat?
Most boob tapes — including our Nueboo boob tape — are waterproof so that they can last all day and even hold up through sweating or swimming.
Can you use Vaseline to remove boob tape?
Yes, aside from body oils and adhesive removers designed for the purpose, products containing petroleum jelly, such as Vaseline or Aquaphor, can make boob tape removal easier.
What oil do you use to remove boob tape?
Baby oil and coconut oil are two good choices for effectively loosening boob tape adhesive. After soaking the tape with the oil and waiting a few minutes, hold down your skin and slowly and gently pull off the tape with your other hand.
How long can you wear boob tape?
Although boob tape can last as long as you wear it, experts don't recommend wearing it for longer than 8 hours to avoid skin irritation.


0 comments