
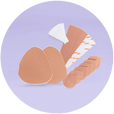


Fashion is tricky. One moment, you're facing the challenge of a backless dress; the next, you're trying to figure out how to wear a halter top without revealing too much. But that's where boob tape comes in.
Halter tops present a unique challenge since they make it impossible to wear a traditional bra without revealing your straps. Fortunately, boob tape can provide all the support you need, helping you to feel comfortable and confident in your outfit. Let's look at how to apply boob tape for halter tops.

How to Prepare to Apply Boob Tape
Perform a Patch Test
Before using boob tape, perform a patch test, especially if you have sensitive skin. Apply small tape to your skin and wait up to 8 hours to check for reactions. This step helps you avoid adverse reactions and ensure a safe experience.
Clean and Dry Your Skin
Proper skin preparation is essential so the tape will adhere correctly. Clean the area with a gentle, oil-free cleanser to remove excess oils and residue. Then, dry the area thoroughly since even slight moisture can affect the tape's adhesive strength.
Protect Your Nipples
Nipple covers are a must with boob tape. Always use them before applying boob tape to avoid damaging your skin or experiencing discomfort while you're wearing the tape (and especially afterward, when you're removing the tape).
How to Apply Boob Tape for Halter Tops
Step 1
When applying boob tape for halter tops, start by applying nipple covers to protect your most sensitive areas. Then, begin placing strips of tape at the base of your breast and extending them toward your collarbone. This technique provides lift while still ensuring you're supported. Remember, the correct placement is critical—too low, and you lose lift; too high, and you risk discomfort or visible tape lines.
Step 2
Stretch the tape as you apply it, starting at the base of your breast and gently stretching it upward to create a natural-looking lift and enhance your cleavage. The direction and amount of stretch will determine your breasts' final shape and support.
Step 3
Ensure the tape is firm but not overly tight. Pulling it too tight could cause discomfort and restrict your movement. Try to balance support and comfort so you can wear the tape for your event.

Achieving a Perfect Application
Boob tape has been a popular choice among celebrities for years, particularly for red-carpet events and revealing outfits. However, many people are intimidated by the idea of wearing boob tape, falsely believing it's difficult to apply. This couldn't be further from the truth, although mastering the art of boob tape application may require some trial and error. But don't be discouraged if it takes a few attempts to get it right. Practice different techniques and placements to find what works best for your body and outfit.
Avoid these common mistakes:
- Having dirty, sweaty, or damp skin
- Placing the tape incorrectly
- Not using a mirror
- Not conducting a patch test first
- Overstretching the tape
Avoiding these common errors will help prevent skin irritation and ensure the tape aligns well with your outfit's contours.
Removing Your Boob Tape
You can wear boob tape for up to 8 hours, but it's essential to keep an eye out for any discomfort while you're wearing it. Always follow the manufacturer's guidelines and remove the boob tape if you feel any irritation. Your safety should always come first to prevent damaging your skin.
To remove your boob tape, begin by soaking the tape in oil, such as baby or coconut oil, for about 5 minutes. This process helps loosen the adhesive, making it easier to peel off without causing skin irritation. Peel the tape off slowly, supporting the skin behind the tape to avoid pulling your skin. As part of your aftercare routine, cleanse and hydrate your skin.
Frequently Asked Questions
What are the primary benefits of using boob tape?
Boob tape is an excellent alternative for backless tops and halter tops where traditional bras don't work. It provides adhesive strength and comfort while correctly supporting your dress or top.
What common mistakes should I avoid when using boob tape?
When using boob tape, avoid having dirty, sweaty, or damp skin, and don't place the tape incorrectly or overstretch it. Additionally, remember to conduct a patch test first and use a mirror during application so you can see exactly where you're placing the tape.
What do I do if the tape keeps peeling off or causes discomfort?
If the tape is peeling off or causing discomfort, remove it and restart the application process. If pieces are difficult to remove, soak them with baby oil to dissolve the adhesive. Then, clean your skin with water and a mild soap. Allow your skin to dry completely. After completing these steps, you can carefully reapply the tape using new strips with fresh adhesive.
Where do I place the boob tape for backless and strapless dresses?
For backless dresses, vertical strips from the base of your breast upwards to your collarbone work best. Shorter strips that don't go as high on your chest are ideal for strapless dresses. For additional support, use one to two horizontal strips across the chest.
How do I achieve the perfect cleavage with boob tape?
The placement largely depends on the amount of cleavage you want to show. With low-cut or plunge necklines, use vertical strips and push your breasts inward. If the neckline isn't plunging, use horizontal strips and pull the tape across your chest to create cleavage.
0 comments